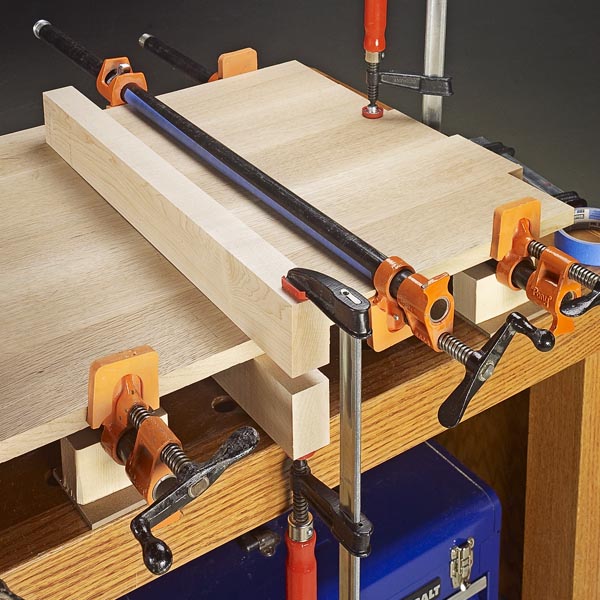
Perhaps the number one use for pipe clamps is gluing up a panel. They provide plenty of pressure for tight joints. Sometimes, the pressure can cause the panel to bow or the clamp heads can mar the edge.
Thankfully, the solutions are simple. To balance the clamping pressure, it’s a good idea to alternate the clamps top and bottom. And be sure to place rubber clamp pads or scrap blocks between the heads and workpiece to eliminate marring. Sometimes the boards will slip out of alignment. On the ends, a small bar clamp will flush up a joint. For the middle of a panel, I reach for a pair of stout, hardwood clamping cauls.
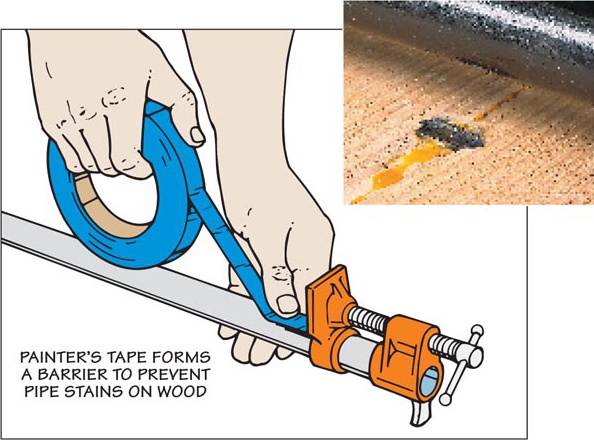
The photo below shows you one of the nasty surprises many woodworkers encounter after using pipe clamps the first time — dark stains. Water in the glue reacts with the metal pipe and tannins in the wood to create the stains. Simple chemistry really, but the stains can be a real challenge to remove. For me, the easiest solution is in the paint aisle at the hardware store or home center — painter’s masking tape. Simply apply a strip of tape to the pipe before you set the boards in place. It’s a fast and inexpensive way to eliminate a frustrating problem.
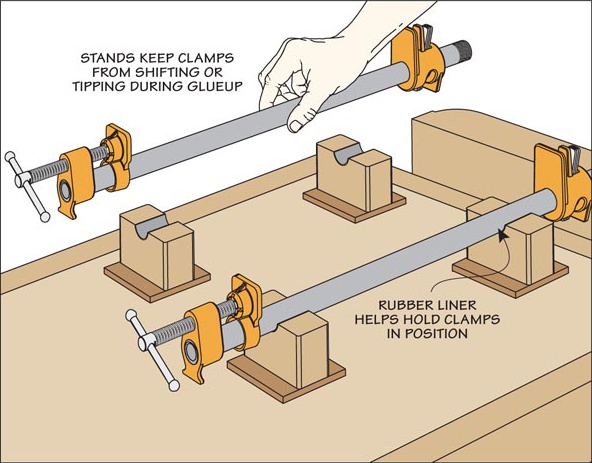
Getting your clamps set up and ready for gluing a panel can be a bit of a juggling act. One or more clamps usually tip over as I set the boards in place. And don’t mention trying to reposition them later. To get my clamps to behave, I made a handful of stands, as illustrated in the drawing below. They’re made from a short length of 2x4 and a piece of hardboard for a base. Notches in the top cradle the pipe. And to keep the clamps from tipping over, I lined the notch with a strip of rubber from a bicycle inner tube.
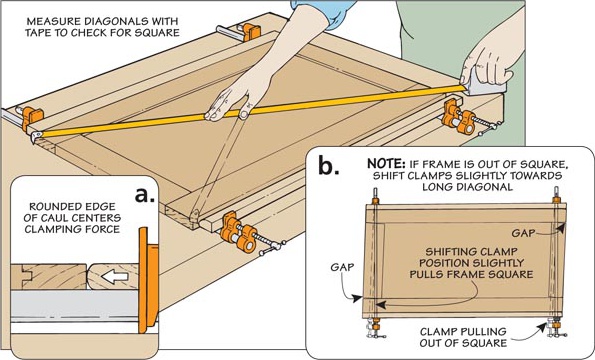
On the surface, clamping a frame seems much easier than gluing up a panel. For starters, you don’t need as many clamps — usually only two. The goal here is to make sure the frame remains flat and square as you tighten the clamps and the glue dries. Alternating the clamps isn’t practical when assembling frames. So you need a different way to keep the frame flat and the rail-to-stile joints tight. I made a narrow caul that’s the same thickness of the frame pieces but has a rounded edge. This ensures the clamping pressure remains along the centerline of the frame pieces.
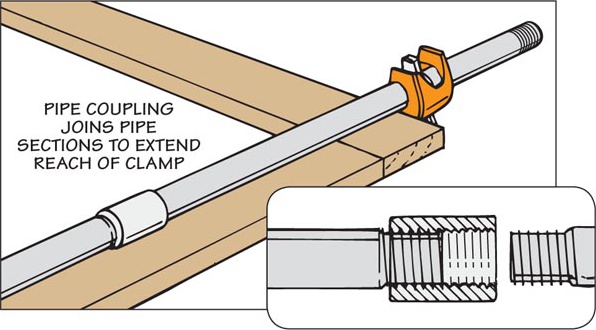
It never fails. At some point in the process of assembling a project, I find that my pipe clamps just aren’t long enough to span a large case or frame. Rather than stock a full-range of pipe lengths, you can pick up a few couplings from the hardware store to “stretch” your existing pipe clamps. Now you can connect the pipes together to accommodate almost any size assembly.