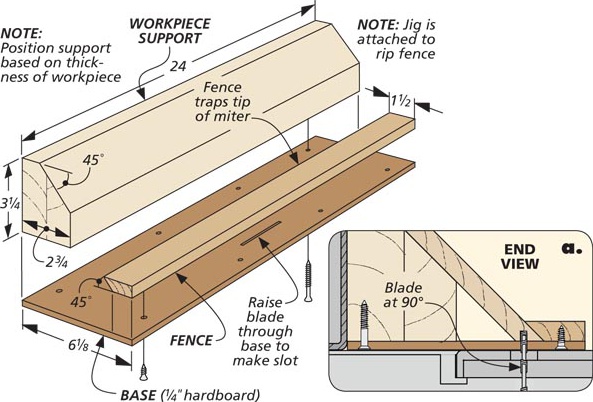
Tightly mitered corners look great and are a real woodworking feat. But mitered corners have a weakness — literally. While a miter joint hides the end grain of the mating pieces, it also relies on end grain for its gluing surface. In solid wood, this doesn’t produce a very strong glue joint. This, on top of the hassle of assembling this “non-locking” joint, can make using miter joints a bit of a challenge. But there’s an easy fix to this problem. I use a spline across the miter joint. A spline is simply a thin piece of wood fit into slots cut into the mitered faces. If you need to cut spline slots in lots of small pieces, you might want to try this jig. The idea is that rather than tilt the saw blade, the workpiece is tilted.
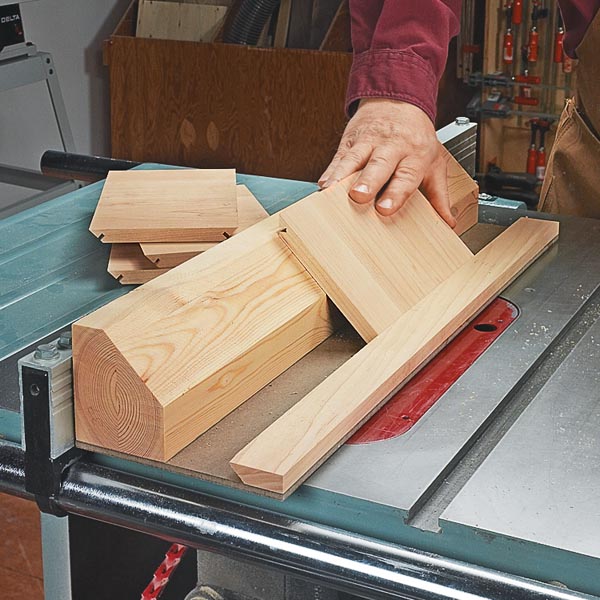
As you can see, the fence captures the mitered end to accurately position the slot. The beveled support keeps the workpiece “on angle” as you slide it along the jig. Since the workpiece is trapped between the fence and the support, the jig is built to accommodate a single thickness of stock.
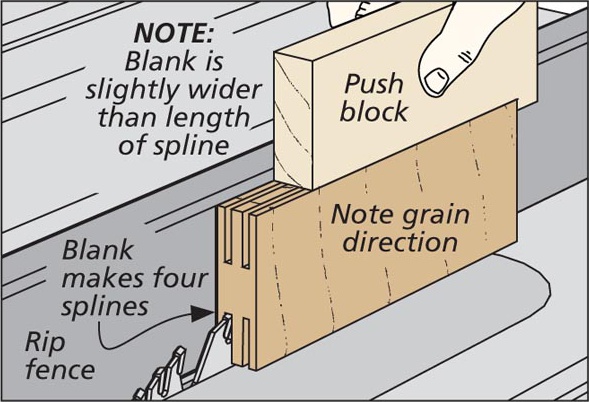
Once the slots have been cut, the final step is to make the crossgrain splines to fit them. The spline is the workhorse of this joint, so sizing it correctly is important. It should slide easily, but snugly, into the slot. And if the ends of the spline will be exposed, you want them to fill the width of the slot completely when the two mitered pieces are assembled. The trick is to start with a short (along the grain) blank that’s a bit wider than the length of the slots the splines need to fill. First, you’ll cut the splines to thickness. You can get four splines from the blank by making a cut at each corner.
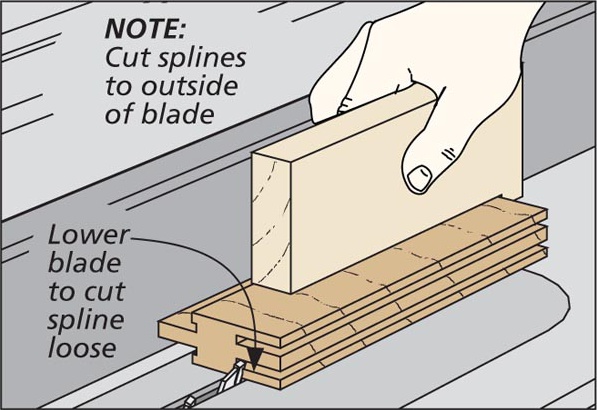
Next, I mark the length of the splines, reposition the rip fence, and cut them from the blank. Just be sure to cut them loose to the outside of the saw blade. After checking the fit of the splines, you’re ready for assembly. Once the glue dries and the splines are trimmed flush, the joints will surely stand the test of time.